

Build your first app#
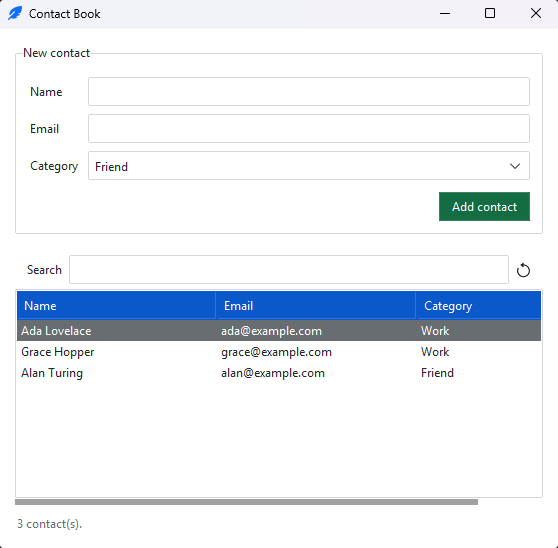
The Quickstart put a themed window on the screen. This tutorial builds a small but complete application on top of it — a contact book with a form, live input validation, and a searchable data table — so you touch every part of a real ttkbootstrap app in one sitting: layout, widgets, events, state, and styling.
We build it one piece at a time. Each step is runnable on its own, and each links onward to the Foundations page that covers the idea in depth. The complete program is at the end.
What you need#
ttkbootstrap installed (see Installation) and Python
3.10+. Everything here uses only ttkbootstrap — no other dependencies.
Step 1 — the application shell#
Every ttkbootstrap app starts with a root window and ends with
mainloop(), the call that hands control to tkinter’s event loop and keeps
the window alive. In between you build your interface.
We put the interface in a Frame subclass rather than
piling widgets directly onto the root. A frame is a container; subclassing it
keeps the app’s state and its widgets together in one object, which is how real
apps stay organized as they grow.
import ttkbootstrap as ttk
from ttkbootstrap.constants import *


class ContactBook(ttk.Frame):
    def __init__(self, master):
        super().__init__(master, padding=16)
        self.pack(fill=BOTH, expand=YES)

        ttk.Label(self, text="Contact Book", font="-size 16 -weight bold").pack()


app = ttk.App(title="Contact Book", theme="bootstrap-light", size=(560, 520))
ContactBook(app)
app.mainloop()
Appis the enhanced root — it creates the window and installs the theme in one step. (It is also exported asttk.Window; both name the same class.)padding=16insets the frame’s contents so nothing hugs the window edge.pack(fill=BOTH, expand=YES)makes the frame grow to fill the window. We import*fromttkbootstrap.constantsso anchors and fills read asBOTH/YES/Winstead of string literals.
See also
How a tkinter app runs — the event loop and why
mainloop()comes last.Structuring an app — the root and single-root rule.
Step 2 — a form with grid#
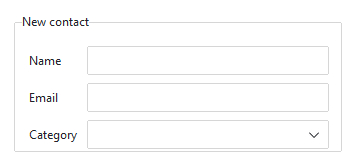
Forms are rows of label + input, so we lay them out with grid — the
geometry manager built for aligned rows and columns. Each widget names its
row and column; sticky says which edges it clings to inside its
cell.
Put this in a new method and call it from __init__:
def _build_form(self):
    form = ttk.Labelframe(self, text="New contact", padding=12)
    form.pack(fill=X)
    form.columnconfigure(1, weight=1)          # let the input column stretch

    ttk.Label(form, text="Name").grid(row=0, column=0, sticky=W, padx=(0, 8), pady=4)
    ttk.Entry(form).grid(row=0, column=1, sticky=EW, pady=4)

    ttk.Label(form, text="Email").grid(row=1, column=0, sticky=W, padx=(0, 8), pady=4)
    ttk.Entry(form).grid(row=1, column=1, sticky=EW, pady=4)

    ttk.Label(form, text="Category").grid(row=2, column=0, sticky=W, padx=(0, 8), pady=4)
    category = ttk.Combobox(form, values=["Friend", "Family", "Work"], state="readonly")
    category.grid(row=2, column=1, sticky=EW, pady=4)
The two pieces that make a grid form behave:
columnconfigure(1, weight=1)gives column 1 (the inputs) all the spare horizontal space, so the entries stretch with the window while the labels in column 0 stay their natural width.sticky=EWon the inputs makes them fill that space left-to-right;sticky=Wleft-aligns the labels.
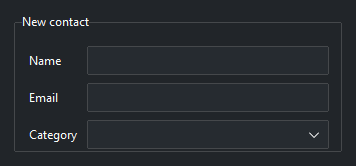
ttk.Labelframe is just a frame with a titled border — a tidy way to group
the form. The state="readonly" combobox lets the user pick a category but
not type a new one.
See also
Layout with grid builds a responsive form step by step — cells, sticky, padding, weight, and spanning.
Step 3 — hold the data with variables#
Right now the entries hold text, but our code has no handle on it. We bind each
input to a variable — a StringVar — with textvariable=. The variable
and the widget stay in sync automatically: read the variable to get what the
user typed, set it to change what the widget shows.
Create the variables in __init__ (before building the form) and attach them:
# in __init__, before self._build_form()
self.name = ttk.StringVar()
self.email = ttk.StringVar()
self.category = ttk.StringVar(value="Friend")
# in _build_form, add textvariable= to each input
ttk.Entry(form, textvariable=self.name).grid(row=0, column=1, sticky=EW, pady=4)
...
ttk.Entry(form, textvariable=self.email).grid(row=1, column=1, sticky=EW, pady=4)
...
category = ttk.Combobox(form, textvariable=self.category,
                        values=["Friend", "Family", "Work"], state="readonly")
category.grid(row=2, column=1, sticky=EW, pady=4)
Giving category an initial value preselects “Friend” in the combobox.
See also
Variables & reactivity and the Variables feature guide for tracing changes and the other variable types.
Step 4 — validate the email#
A contact book with malformed emails is not much use. ttkbootstrap ships a small
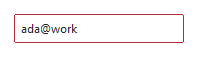
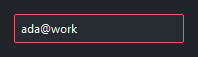
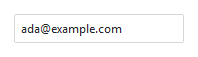
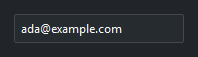
validation framework: attach a rule to an input and a failing value flags the
widget with a danger-red border until it becomes valid again.
Keep a reference to the email entry so we can attach a rule to it:
# in _build_form, replace the plain email Entry line:
email_entry = ttk.Entry(form, textvariable=self.email)
email_entry.grid(row=1, column=1, sticky=EW, pady=4)
ttk.Validation.regex(email_entry, r"^[^@\s]+@[^@\s]+\.[^@\s]+$")
regex() passes when the contents match the
pattern (here: something @ something . something). By default the
rule fires on focus-out, so the field flags only after the user leaves it —
not on every keystroke.
See also
Input validation for the full rule set, custom rules, and controlling when rules run.
Step 5 — show the contacts in a table#
Contacts need somewhere to live. Tableview is
ttkbootstrap’s data table — a themed grid with sorting, an optional search bar,
and column controls built in. We give it column headings and start it empty:
def _build_table(self):
    self.table = ttk.Tableview(
        self,
        coldata=["Name", "Email", "Category"],
        rowdata=[],
        searchable=True,
        bootstyle="primary",
        height=8,
    )
    self.table.pack(fill=BOTH, expand=YES, pady=(16, 8))
coldatais the list of column headings;rowdata=[]starts with no rows.searchable=Trueadds the search bar above the table — press Enter in it to filter.fill=BOTH, expand=YESlets the table soak up the space below the form as the window resizes.
See also
The Tableview widget page for its full API — pagination, column configuration, exporting, and programmatic selection.
A note on styling#
We styled as we went, with bootstyle= — "success" for the Add button,
"primary" for the table’s accents, "secondary"/"danger" on the
status label to signal calm vs. error. bootstyle describes intent (a
color and, optionally, a variant), never a literal color, so the whole app
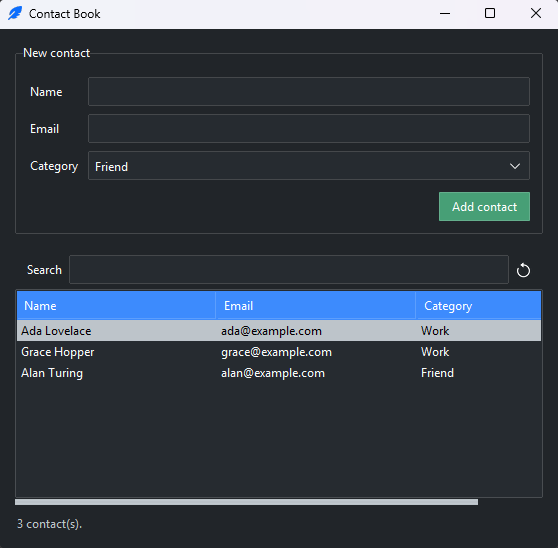
re-themes when you change theme on the App. Try
theme="bootstrap-dark" — every widget follows.
See also
Styling with bootstyle for the full grammar and the reference table of every keyword.
The complete app#
import ttkbootstrap as ttk
from ttkbootstrap.constants import *
class ContactBook(ttk.Frame):
def __init__(self, master):
super().__init__(master, padding=16)
self.pack(fill=BOTH, expand=YES)
self.name = ttk.StringVar()
self.email = ttk.StringVar()
self.category = ttk.StringVar(value="Friend")
self._build_form()
self._build_table()
self._build_status()
def _build_form(self):
form = ttk.Labelframe(self, text="New contact", padding=12)
form.pack(fill=X)
form.columnconfigure(1, weight=1)
ttk.Label(form, text="Name").grid(row=0, column=0, sticky=W, padx=(0, 8), pady=4)
ttk.Entry(form, textvariable=self.name).grid(row=0, column=1, sticky=EW, pady=4)
ttk.Label(form, text="Email").grid(row=1, column=0, sticky=W, padx=(0, 8), pady=4)
email_entry = ttk.Entry(form, textvariable=self.email)
email_entry.grid(row=1, column=1, sticky=EW, pady=4)
ttk.Validation.regex(email_entry, r"^[^@\s]+@[^@\s]+\.[^@\s]+$")
ttk.Label(form, text="Category").grid(row=2, column=0, sticky=W, padx=(0, 8), pady=4)
category = ttk.Combobox(form, textvariable=self.category,
values=["Friend", "Family", "Work"], state="readonly")
category.grid(row=2, column=1, sticky=EW, pady=4)
add_button = ttk.Button(form, text="Add contact", bootstyle="success",
command=self.add_contact)
add_button.grid(row=3, column=1, sticky=E, pady=(8, 0))
def _build_table(self):
self.table = ttk.Tableview(
self,
coldata=["Name", "Email", "Category"],
rowdata=[],
searchable=True,
bootstyle="primary",
height=8,
)
self.table.pack(fill=BOTH, expand=YES, pady=(16, 8))
def _build_status(self):
self.status = ttk.Label(self, text="No contacts yet.", bootstyle="secondary")
self.status.pack(fill=X)
def add_contact(self):
    name = self.name.get().strip()
    email = self.email.get().strip()
    if not name or not email:
        self.status.configure(text="Name and email are required.", bootstyle="danger")
        return
    self.table.insert_row(values=[name, email, self.category.get()])
    count = len(self.table.get_rows())
    self.status.configure(text=f"{count} contact(s).", bootstyle="secondary")
    self.name.set("")
    self.email.set("")
app = ttk.App(title="Contact Book", theme="bootstrap-light", size=(560, 520))
ContactBook(app)
app.mainloop()
Where to go next#
You have now used every layer of a ttkbootstrap app. To go deeper:
Structure — Structuring an app for the root, the single-root rule, and larger app skeletons.
Layout — Layout with grid and Layout with pack.
Styling — Styling with bootstyle and the Theming & Colors guide.